One command. A few minutes. v1.27.3
Install iNetPanel
Fully automated installation on a clean Debian 12 or 13 server. Host your own websites from home in minutes.
See It In Action
Watch the Full Installation
Install command
apt-get install -y curl && bash <(curl -s https://inetpanel.info/latest)
Run this as root on a clean Debian 12 or 13 server via SSH.
Requirements
- Clean Debian 12 or 13 (Bookworm or Trixie) — no existing Apache, nginx, PHP, MariaDB, or MySQL installed
- Root SSH access to a dedicated server, VPS, LXC container, or bare-metal machine
- Free Cloudflare account with a domain pointed to Cloudflare DNS (optional — see note below)
- Cloudflare API Token with Zone DNS Edit permissions (optional — see note below)
- Minimum 2 GB RAM recommended (4+ GB for production use); 15 GB disk minimum (20+ GB recommended)
- Server can reach the internet (outbound only — no inbound ports needed)
Without Cloudflare, iNetPanel runs in manual port-based mode. Zero Trust Tunnel, DNS management, SSL via DNS-01, Email Routing, and DDNS will not be available. Hosted websites would need to be accessed by
IP:PORT directly — suitable for local network use only. Public internet hosting from home requires Cloudflare.
What the installer sets up
cloudflared daemon via Zero Trust — no open ports needed
Web server for hosted sites on ports 1080+
Lightweight web server for the admin panel. Serves it over HTTPS on 443 and redirects plain HTTP.
Via sury.org repo with common extensions. Upload limit 100 MB.
Database server (localhost only, no public access). Timezone tables auto-loaded.
On dedicated Apache vhost at port 8443/8888 with SSO auto-login
Optional — lock down admin access to VPN peers only
Intrusion prevention and zone-based firewall
Let's Encrypt certificate management
FTP server with chroot, whitelist mode, passive ports 40000-50000
Cloned from GitHub, deployed to /var/www/inetpanel
DNS utilities (dig) for hostname verification and DNS checks
6-step setup wizard
-
Admin Account
Set your iNetPanel admin username and password with confirmation. Client-side validation ensures strong passwords. Stored with bcrypt hashing. Since 1.26 the wizard is served over HTTPS, so this password never crosses the network in clear text.
-
Timezone & Panel Name
Select your server timezone (automatically synced to MariaDB) and set your panel's display name. MariaDB timezone tables are loaded automatically.
-
Cloudflare Connection
Enter your Cloudflare API credentials with a "Test Connection" verification button. Or skip to use manual port-based mode without Cloudflare. Like every other step, this one is served over HTTPS.
-
DDNS & VPN (Cloudflare only)
Configure DDNS hostname to keep a Cloudflare A record updated with your IP. Set up WireGuard VPN for remote access to admin/client UI, FTP, and SSH.
-
Server Hostname
Configure your server hostname. If Cloudflare is set up, a "Verify" button checks DNS existence and creates the A record automatically. Shows server IP with guidance on private vs public addresses.
-
Complete
Final installation execution. A lock file is created to prevent re-running the installer. All services are started and verified.
The wizard collects your admin password and your Cloudflare API key. Both used to travel over plain HTTP. The installer now generates a self-signed certificate, serves the panel over TLS on port 443 and redirects HTTP, so those credentials are encrypted from the first step.
Your browser will warn you once — that is expected for a self-signed certificate, and the installer's closing message explains it. Swap in a trusted certificate whenever you like:
inetp panel_ssl <hostname>
Already running 1.25 or earlier? Existing installs are unaffected and need no action — run the same command to move an existing panel onto HTTPS.
The 6-step wizard takes under 3 minutes to complete (about 45 seconds if you have your Cloudflare details ready).
What you'll see after setup
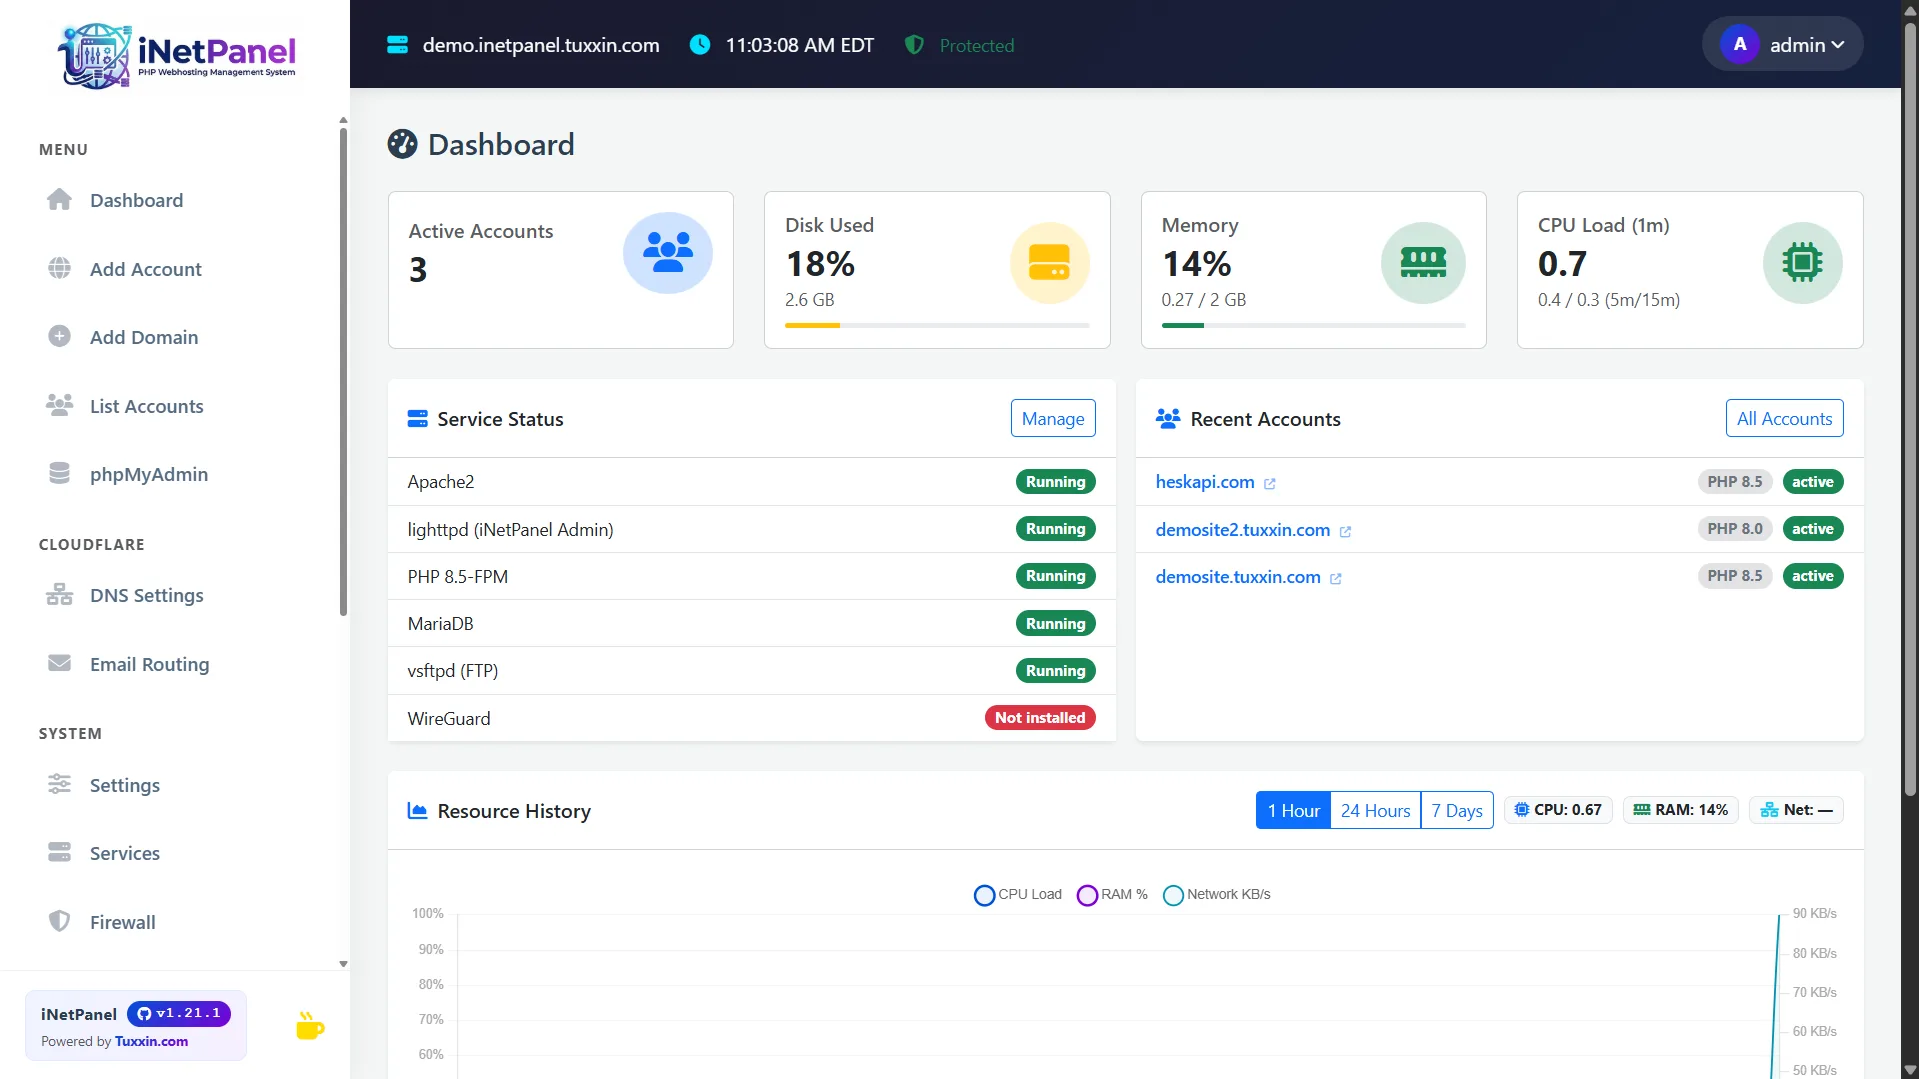
Admin Dashboard
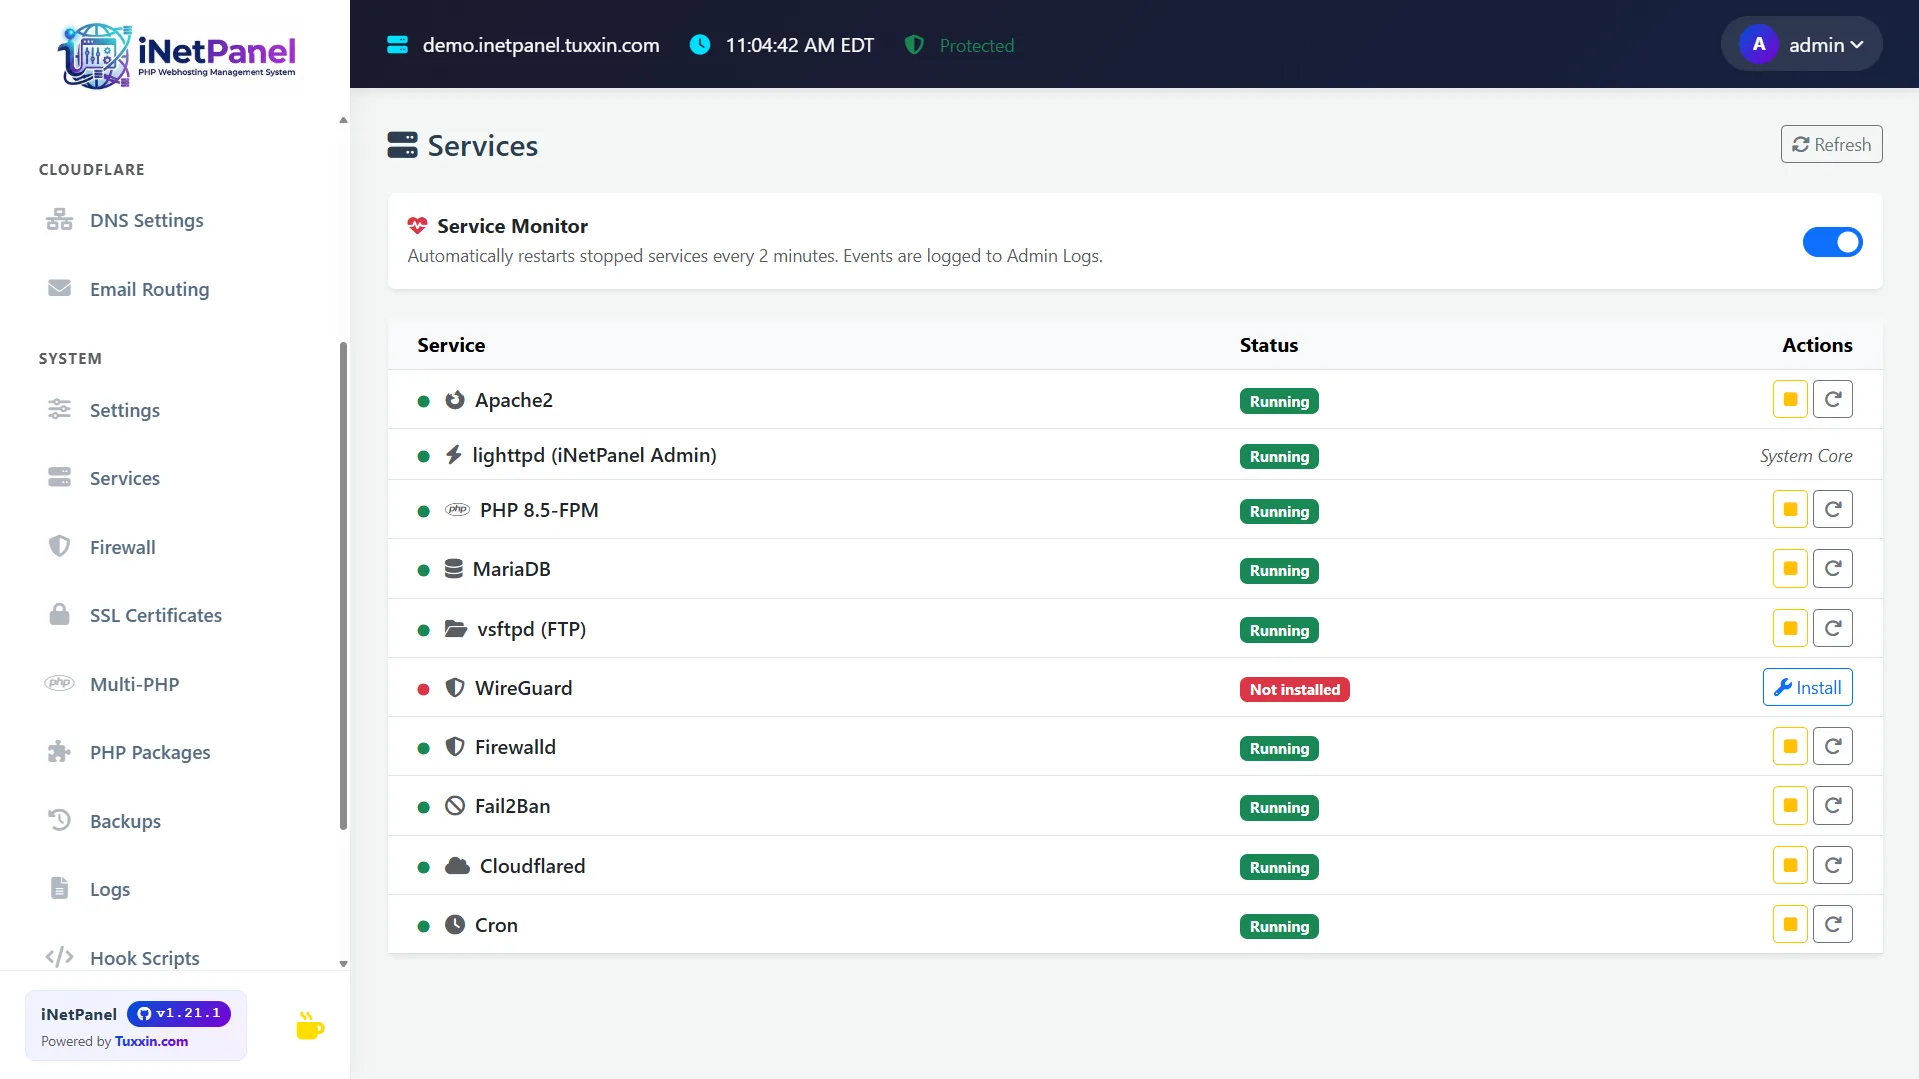
Service Manager
Accessing your panel
After setup completes, iNetPanel is accessible via the Cloudflare Tunnel URL displayed in the terminal. For home networks, access is local; for dedicated or VPS servers, you can use DDNS to reach it remotely via VPN. SSH access is on port 1022.
The panel is served over HTTPS. On a fresh install that is a self-signed certificate, so your browser will warn you the first time — this is expected. Run inetp panel_ssl <hostname> to replace it with a trusted certificate.
Port & service reference
| Component | Technology | Port | Notes |
|---|---|---|---|
| Admin Panel | lighttpd + PHP-FPM | 80/443 | iNetPanel admin & client UI |
| phpMyAdmin | Apache2 (signon auth) | 8443/8888 | SSO auto-login from admin & client portals |
| Hosted Sites | Apache2 SSL vhosts | 1080+ | One port per hosting account, proxied via Cloudflare Tunnel |
| Panel Database | SQLite (WAL mode) | — | Local file, not a network service |
| Site Databases | MariaDB | 3306 | Localhost only — no remote access |
| WireGuard VPN | WireGuard | 1443/UDP | Optional — only externally open port when lockdown enabled |
| Cloudflare Tunnel | cloudflared | — | Outbound only — no inbound ports required |
| Firewall | firewalld + fail2ban | — | Zone-based, SSH on 1022, all others blocked by default |
| FTP | vsftpd | 21, 40000–50000 | Chroot, whitelist-only. Passive mode ports configured and firewalled. |
| SSH | OpenSSH | 1022 | Non-standard port to reduce scan noise |
CLI tools — inetp
35 built-in commands available via inetp <command> after installation. The most commonly used are listed below; run inetp --help for the full list.
| Command | Description |
|---|---|
inetp status | Server health summary — uptime, load, disk, RAM, swap, service statuses, SSL expiry, backup age, pending updates |
inetp benchmark | Quick benchmarks — disk I/O speed, network throughput, PHP opcache stats, MySQL query time |
inetp reset_password --username USER | Reset FTP/SSH/MySQL password for a hosting user |
inetp disk_report | Disk usage breakdown per user/domain with top largest files and directories |
inetp audit | Security audit — file permissions, PHP version check, open ports, weak MySQL passwords, fail2ban status |
inetp malware_scan --username USER | Scan user files for common PHP backdoors and webshells |
inetp cleanup | Clear PHP sessions, tmp files, old logs, orphaned FPM pools, stale backups |
inetp rotate_logs | Force logrotate on all user and system logs |
inetp db_repair | Check and repair all MariaDB tables |
inetp dns_check --domain DOMAIN | DNS propagation, SSL chain validation, HTTP response test, Cloudflare tunnel status |
inetp speedtest | Server bandwidth test (curl-based, no external dependencies) |
Frequently asked questions
The installer requires a clean Debian 12 or 13 system. Do not run on a server with an existing web stack — it will conflict with Apache, nginx, or existing PHP installations.
Installed stack
 lighttpd
 Apache 2.4
 PHP 8.5
 MariaDB
 Cloudflare
 WireGuard
 Let's Encrypt
 fail2ban
Actively Maintained
Latest releases
iNetPanel ships regular updates — here are the newest.
Hotfix: the weekly Cloudflare RemoteIP refresh deleted its own Apache config every Monday. /etc/cron.d files do not inherit PATH f…
Hotfix: restores admin hook scripts, which 1.27.1 silently disabled. 1.27.1 repointed the hook sudoers grant out of /tmp but left…
Security: privileged command input is no longer staged in world writable /tmp. Same root cause as GHSA mjmx xpqq p2h8 in a differe…